
 |
| Online Example at: www.reich.com.pe/pedidos |
The Recipe
For this Example we are going to need this 3 modules installed on your drupal site :Of course feel free to install any module you need to improve the view (like imagecache module).
How to Do It
1) Ok, first create a view and put all the fields and filters and well, anything you want on your views excepting of course the image we want to be tooltiped. |
| In this case we are adding only the Title field. Lets keep it simple. |
2) Now Add the field that is going to contain the tooltip info and exclude it from display.
 |
| In this case, the node body is our chosen one. Dont forget to exclude it from display |
3) Next, add the field were we want the tooltip to appear, and do the following ministeps:
- check the "Rewrite the output of this field". A textbox should appear
- Wrap your field (in this case [field_image_cache_fid]) in a div.
- Put a class called tip (or whatever word you choose) on the div.
- Put a title equal to the field on step 2.

Do you notice the words between brackets [ ]?. Those are replacement patterns words that essentially are all the fields that you put before the actual field youre editing. You can see a list of all the active replacement patters after the "Rewrite the output of this field" Textbox. It looks like this:
 |
| If you dont a field there, then 90% of the cases are that you added the field AFTER the field yoyre rewriting. |
Create a Custom Selector like this:
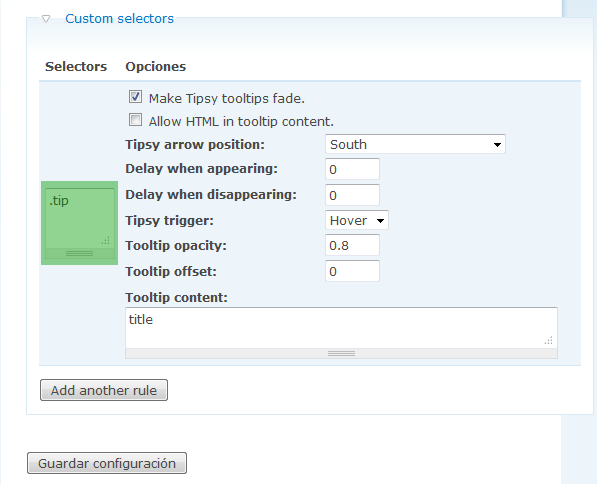 | ||
Save the configuration and enjoy!. Dont forget to clean caches just in case. Comments?